Customize the CCH iFirm dashboard
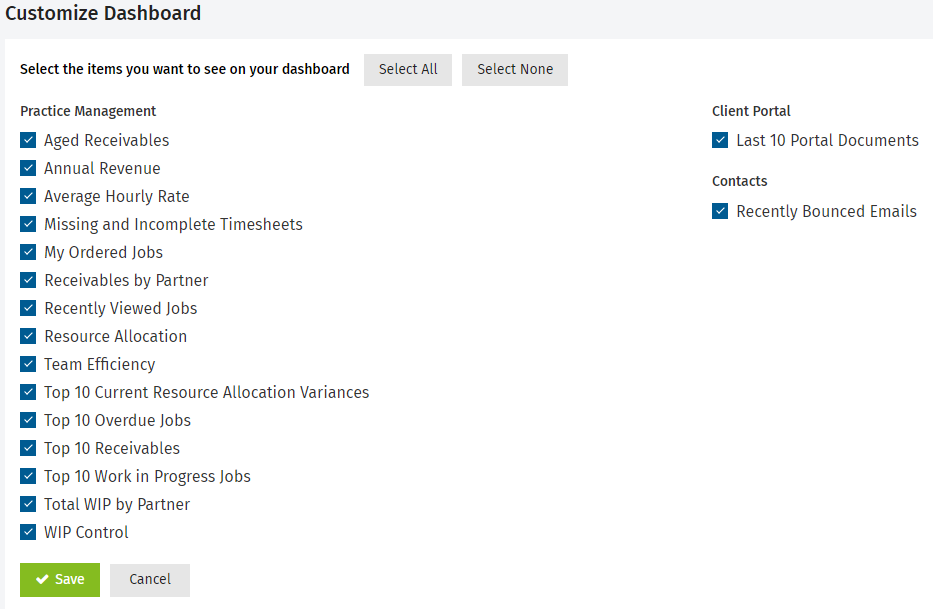
When you log on to CCH iFirm you will see the Dashboard page. The dashboard consists of various widgets that provide live information on the key areas of your firm. The information you see on your dashboard depends on your security role. You can choose which dashboard widgets are displayed on your dashboard.
- Click your user name in the top menu; then click Customize Dashboard.
- Select the check boxes of the items you want displayed on your dashboard, and clear the check boxes of the items you do NOT want displayed.
- Click Save.

You can control the position of your dashboard widgets. You can rearrange them so that the more relevant widgets appear at the top. The arrangement of widgets applies to the individual user profile only.
- Left click your mouse and hold it down to drag the widget to a new location.
- Other widgets will move to accommodate the one being dragged.
- Release the left click button on your mouse to save the widgets new location.
Click the Delete button ![]() in the widget header and then click Yes to confirm.
in the widget header and then click Yes to confirm.

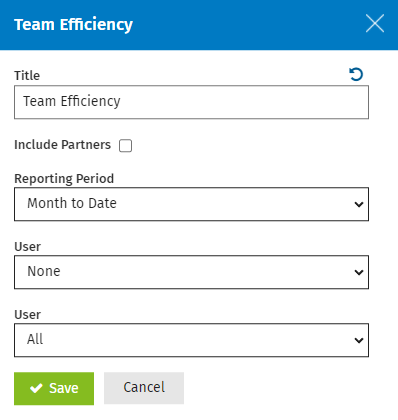
Each dashboard widget has settings that you can apply to change the data displayed in the widget. The settings you apply will be saved for your user profile, so the widgets will be set up the way you like it every time you visit the dashboard. The settings vary for each dashboard widget, depending on what is relevant. For example, the option to filter by billing entity is relevant on receivable and invoice widgets but not on job widgets.
- Click the Settings button
 in the widget header.
 - Make your changes.
- Each widget will have its own settings.
- If you change the title from the default, the next time you access the widget settings you will see a blue Revert button
 beside the title. Click this button to restore the default title text.
 - If you change any other settings (not the title), you will see a filter button to the right of the title on the widget.
- Click Save.
